Before the meeting
- Before the meeting, go to your calendar in Outlook on the Web Calendar, Microsoft Outlook calendar or Microsoft Teams calendar. Note that the Microsoft Teams calendar has the same event items as your Outlook Calendar. (If the Calendar icon does not appear in the left column of Teams, click or tap the three-dots/more-actions icon, then select Calendar.)
- Browse to the meeting event item on your calendar, making sure it's the correct meeting.
- Double-click to fully open the specific calendar event item for your online class session/meeting. If you single-click, a pop-up preview of the event may appear, and the preview may not show you what you need.
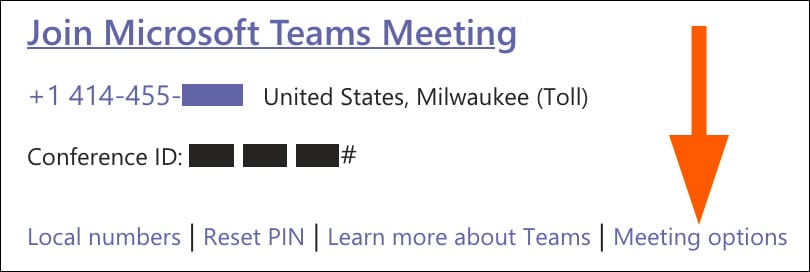
- Scroll down to view the Meetings Options link. Click or tap the Meetings Options link.
- "Meeting Options" opens.
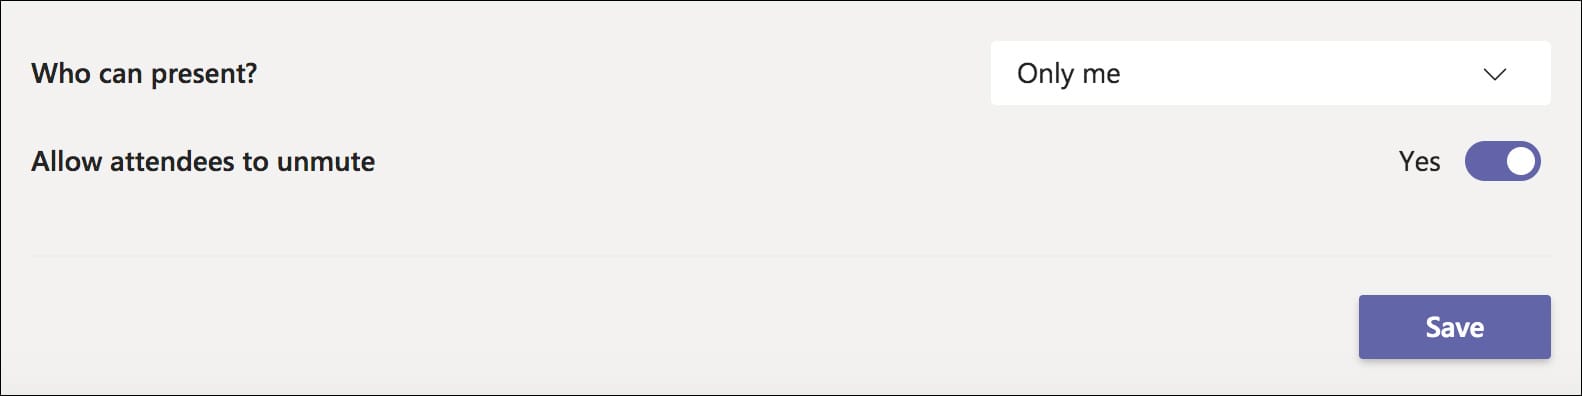
- For "Who can present?" choose Only me. This setting gives your participants the attendee role.
If you have select persons who will present, you can also choose "Specific people" and identify presenters who can unmute. Everyone else will have the attendee role with mics disabled. - For "Allow attendees to mute," consider these two options.
- If you want your attendees to join the meeting silently with mics disabled, set "Allow attendees to unmute" to No.
- Otherwise, keep the setting as Yes to allow attendees to unmute and speak briefly upon joining. Then you can disable mics for all attendees at any point in the meeting.
- Click or tap Save to activate the meeting options.
Upon joining the meeting
- If you had set "Allow attendees to mute" to No in Step 7a above, skip these steps and read the "During the meeting" section below. Your attendees will join the meeting with mics disabled.
- If you had set "Allow attendees to mute" to Yes in Step 7b above, announce that all attendees will be muted and unable to unmute. The Raise Hand icon will allow the instructor or meeting organizer to unmute an attendee.
- From the meeting controls, click or tap the Participants icon.

- The Participants panel opens. Click or tap the three-dots/more-actions icon to reveal a menu, then select "Don't allow attendees to unmute." This action also mutes all attendees.
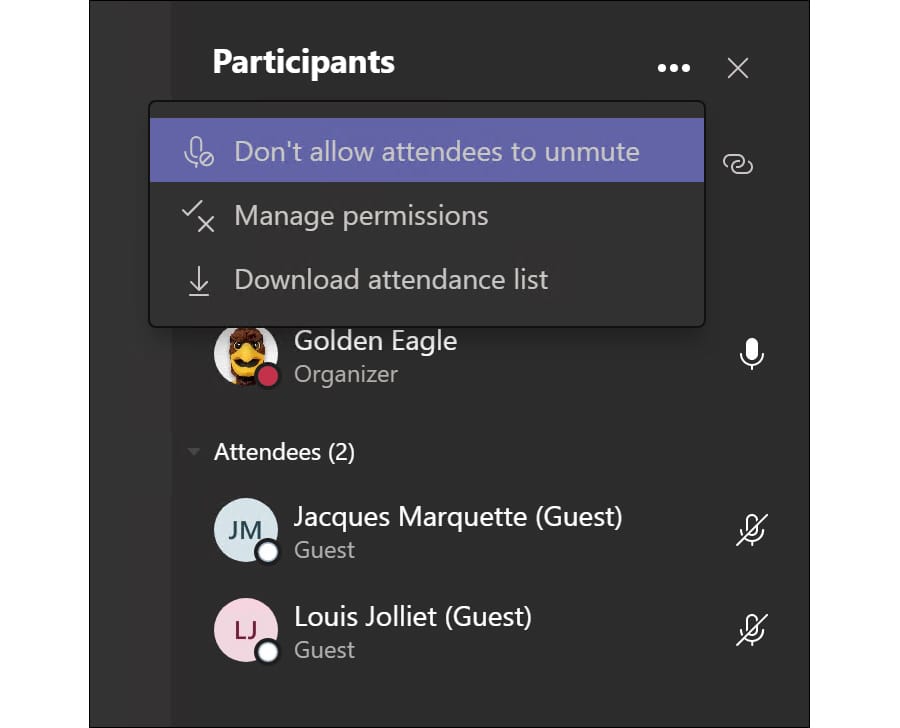
- You will see a warning: "Don't allow attendees to unmute? Attendees won't be able to unmute themselves. If someone raises their hand, a presenter can let them unmute."
- Click or tap Don't Allow.
- For attendees, the mic icon grays out. A notice appears for attendees: "Mic is disabled for all attendees. Raise your hand if you'd like to speak."
During the meeting
When attendees use the raise hand icon, you as the instructor or meeting organizer are notified.
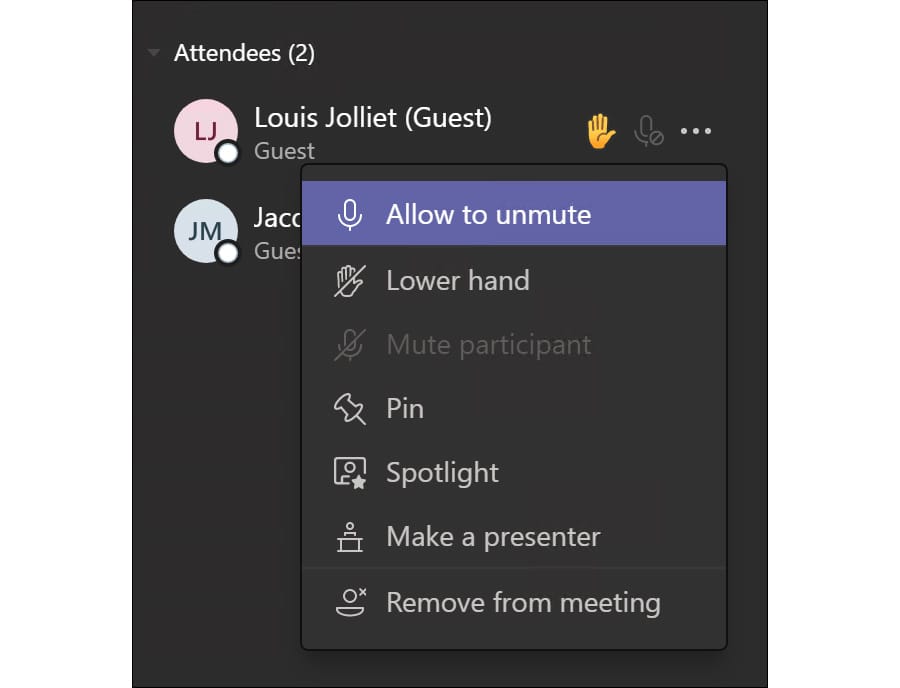
- From the meeting controls, click or tap the Participants icon.
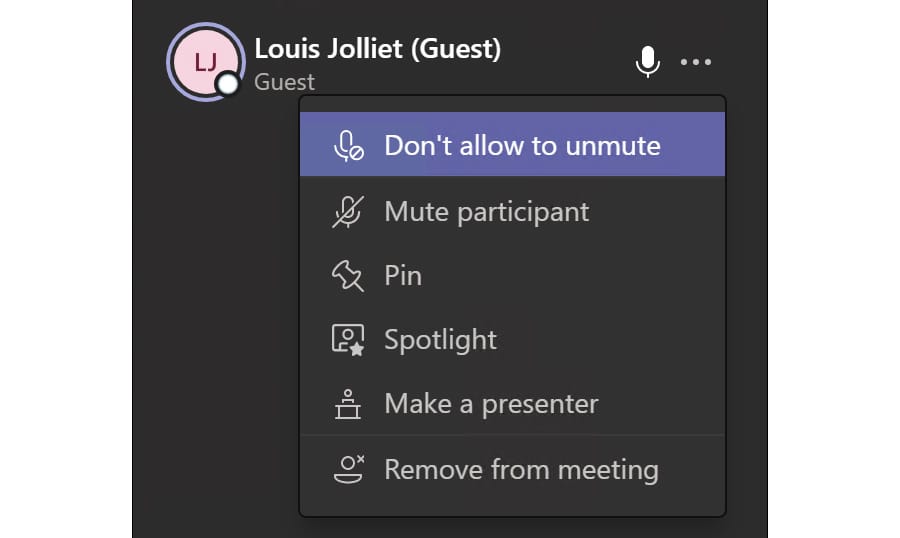
- The Participants panel opens. In the Participant list, a hand icon will appear for the attendee seeking to speak. Click the three-dots/more-actions icon that appears with the attendee's name. From the menu, select "Allow to unmute."
- The attendee is notified: "Your mic has been enabled. Unmute if you'd like to speak." The attendee unmutes the mic and speaks.
- When attendee is finished speaking, return to the Participant list. Click or tap the three-dots/more-actions icon that appears with the attendee's name. Select "Don't allow to unmute" to disable the attendee's mic.